텍스트를 입력할 때, 키보드가 텍스트필드를 가리게 된다면, 좋지 않은 사용자 경험을 제공하게 된다.
이러한 문제를 해결하기 위해, 키보드가 올라온 만큼 텍스트 필드의 위치를 위로 이동시키려고 한다.
해야할 일은 다음과 같다.
1. 키보드 유무 감지
2. 키보드 높이 구하기
3. 키보드 애니메이션 정보 구하기
4. 텍스트 필드 이동
1. 키보드 유무 감지
먼저 키보드의 존재 여부를 파악하기 위해서 UIResponder.keyboardWillShowNotification를 감지하는 옵저버로 뷰컨트롤러를 설정한다.
override func viewDidAppear(_ animated: Bool) {
    super.viewDidAppear(animated)
    // keyboardWillShowNotification,keyboardWillHideNotification에 대한 옵저버로 self 등록
    // 등록한 옵저버는 keyboardWillAppear(notification:)와 keyboardWillDisappear(notification:)를 호출함
    NotificationCenter.default.addObserver(self, selector: #selector(keyboardWillAppear(notification:)), name: UIResponder.keyboardWillShowNotification, object: nil)
    NotificationCenter.default.addObserver(self, selector: #selector(keyboardWillDisappear(notification:)), name: UIResponder.keyboardWillHideNotification, object: nil)
}

override func viewWillDisappear(_ animated: Bool) {
    super.viewWillDisappear(animated)
    // keyboardWillShowNotification, keyboardWillShowNotification에 대한 옵저버에서 self 제거
    NotificationCenter.default.removeObserver(self, name: UIResponder.keyboardWillShowNotification, object: nil)
    NotificationCenter.default.removeObserver(self, name: UIResponder.keyboardWillShowNotification, object: nil)
}
알림이 감지되면 셀렉터 함수를 호출한다.
2. 키보드 높이 구하기
// 키보드의 최종 프레임 정보를 나타내는 UserInfoKey
guard let keyboardSize: CGRect = (notification.userInfo?[UIResponder.keyboardFrameEndUserInfoKey] as? NSValue)?.cgRectValue else {
    return
}
키보드의 높이를 구하기 위해서 userInfo의 UIResponder.keyboardAnimationDurationUserInfoKey에 저장되어있는 키를 CGRect 타입으로 받아온다.
3. 키보드 애니메이션 정보 구하기
// 키보드 애니메이션 지속시간
guard let keyboardAnimationDuration = notification.userInfo?[UIResponder.keyboardAnimationDurationUserInfoKey] as? TimeInterval else {
    return
}
// 키보드 애니메이션 커브 저장
let animationCurveRawValue: Int = notification.userInfo?[UIResponder.keyboardAnimationCurveUserInfoKey] as? Int ?? 0
let animationCurve: UIView.AnimationCurve = UIView.AnimationCurve(rawValue: animationCurveRawValue) ?? .easeInOut
keyboardAnimationDurationUserInfoKey로 지속시간을 구하고,
keyboardAnimationCurveUserInfoKey로 가져온 rawValue로 AnimationCurve의 enum을 구한다.
https://developer.apple.com/documentation/uikit/uiresponder/1621613-keyboardanimationcurveuserinfoke
keyboardAnimationCurveUserInfoKey | Apple Developer Documentation
A user info key to retrieve the animation curve that the system uses to animate the keyboard onto or off the screen.
developer.apple.com
4. 텍스트 필드 이동
// 애니메이션 속도를 키보드 애니메이션과 동일한 애니메이션 곡선으로 설정
UIView.setAnimationCurve(animationCurve)

// 제약 조건 업데이트
messageTextStack.snp.updateConstraints { make in
    make.bottom.equalToSuperview().inset(keyboardSize.height)
}

// 뷰 애니메이션 블록 내에서 애니메이션 실행
UIView.animate(withDuration: keyboardAnimationDuration) {
    self.view.layoutIfNeeded()
}inset(keyboardSize.height)으로 아까 구한 키보드의 높이 만큼을 더한 값으로 제약 조건을 업데이트한다.
setAnimationCurve가 레거시 메소드라 아래 코드로 수정했다.
// messageTextStack 애니메이션 속성 설정
UIView.animate(withDuration: keyboardAnimationDuration, delay: 0, options: [UIView.AnimationOptions(rawValue: UInt(animationCurve.rawValue))]) {
    // 제약 조건 업데이트
    self.messageTextStack.snp.updateConstraints { make in
        make.bottom.equalToSuperview().inset(keyboardSize.height)
    }

    // 화면 레이아웃 업데이트
    self.view.layoutIfNeeded()
}
사용된 함수 animate() 는 뷰의 애니메이션을 설정하고 실행하는 메소드이다.
바꾼 제약조건을 layoutIfNeeded()메소드로 뷰에 적용 시켜야 한다.
animate(withDuration:delay:options:animations:completion:)
class func animate(
    withDuration duration: TimeInterval,
    delay: TimeInterval,
    options: UIView.AnimationOptions = [],
    animations: @escaping () -> Void,
    completion: ((Bool) -> Void)? = nil
)
duration: 애니메이션의 지속 시간을 나타내는 TimeInterval(Double) 값애니메이션의 총 시간을 지정
delay: 애니메이션 시작 전의 지연 시간을 나타내는 TimeInterval(Double) 값
options: 애니메이션에 적용할 옵션을 나타내는 UIView.AnimationOptions enum값
animations: 애니메이션 블록
completion: 애니메이션이 완료된 후에 호출되는 완료 핸들러 블록. 위에서는 사용하지 않음
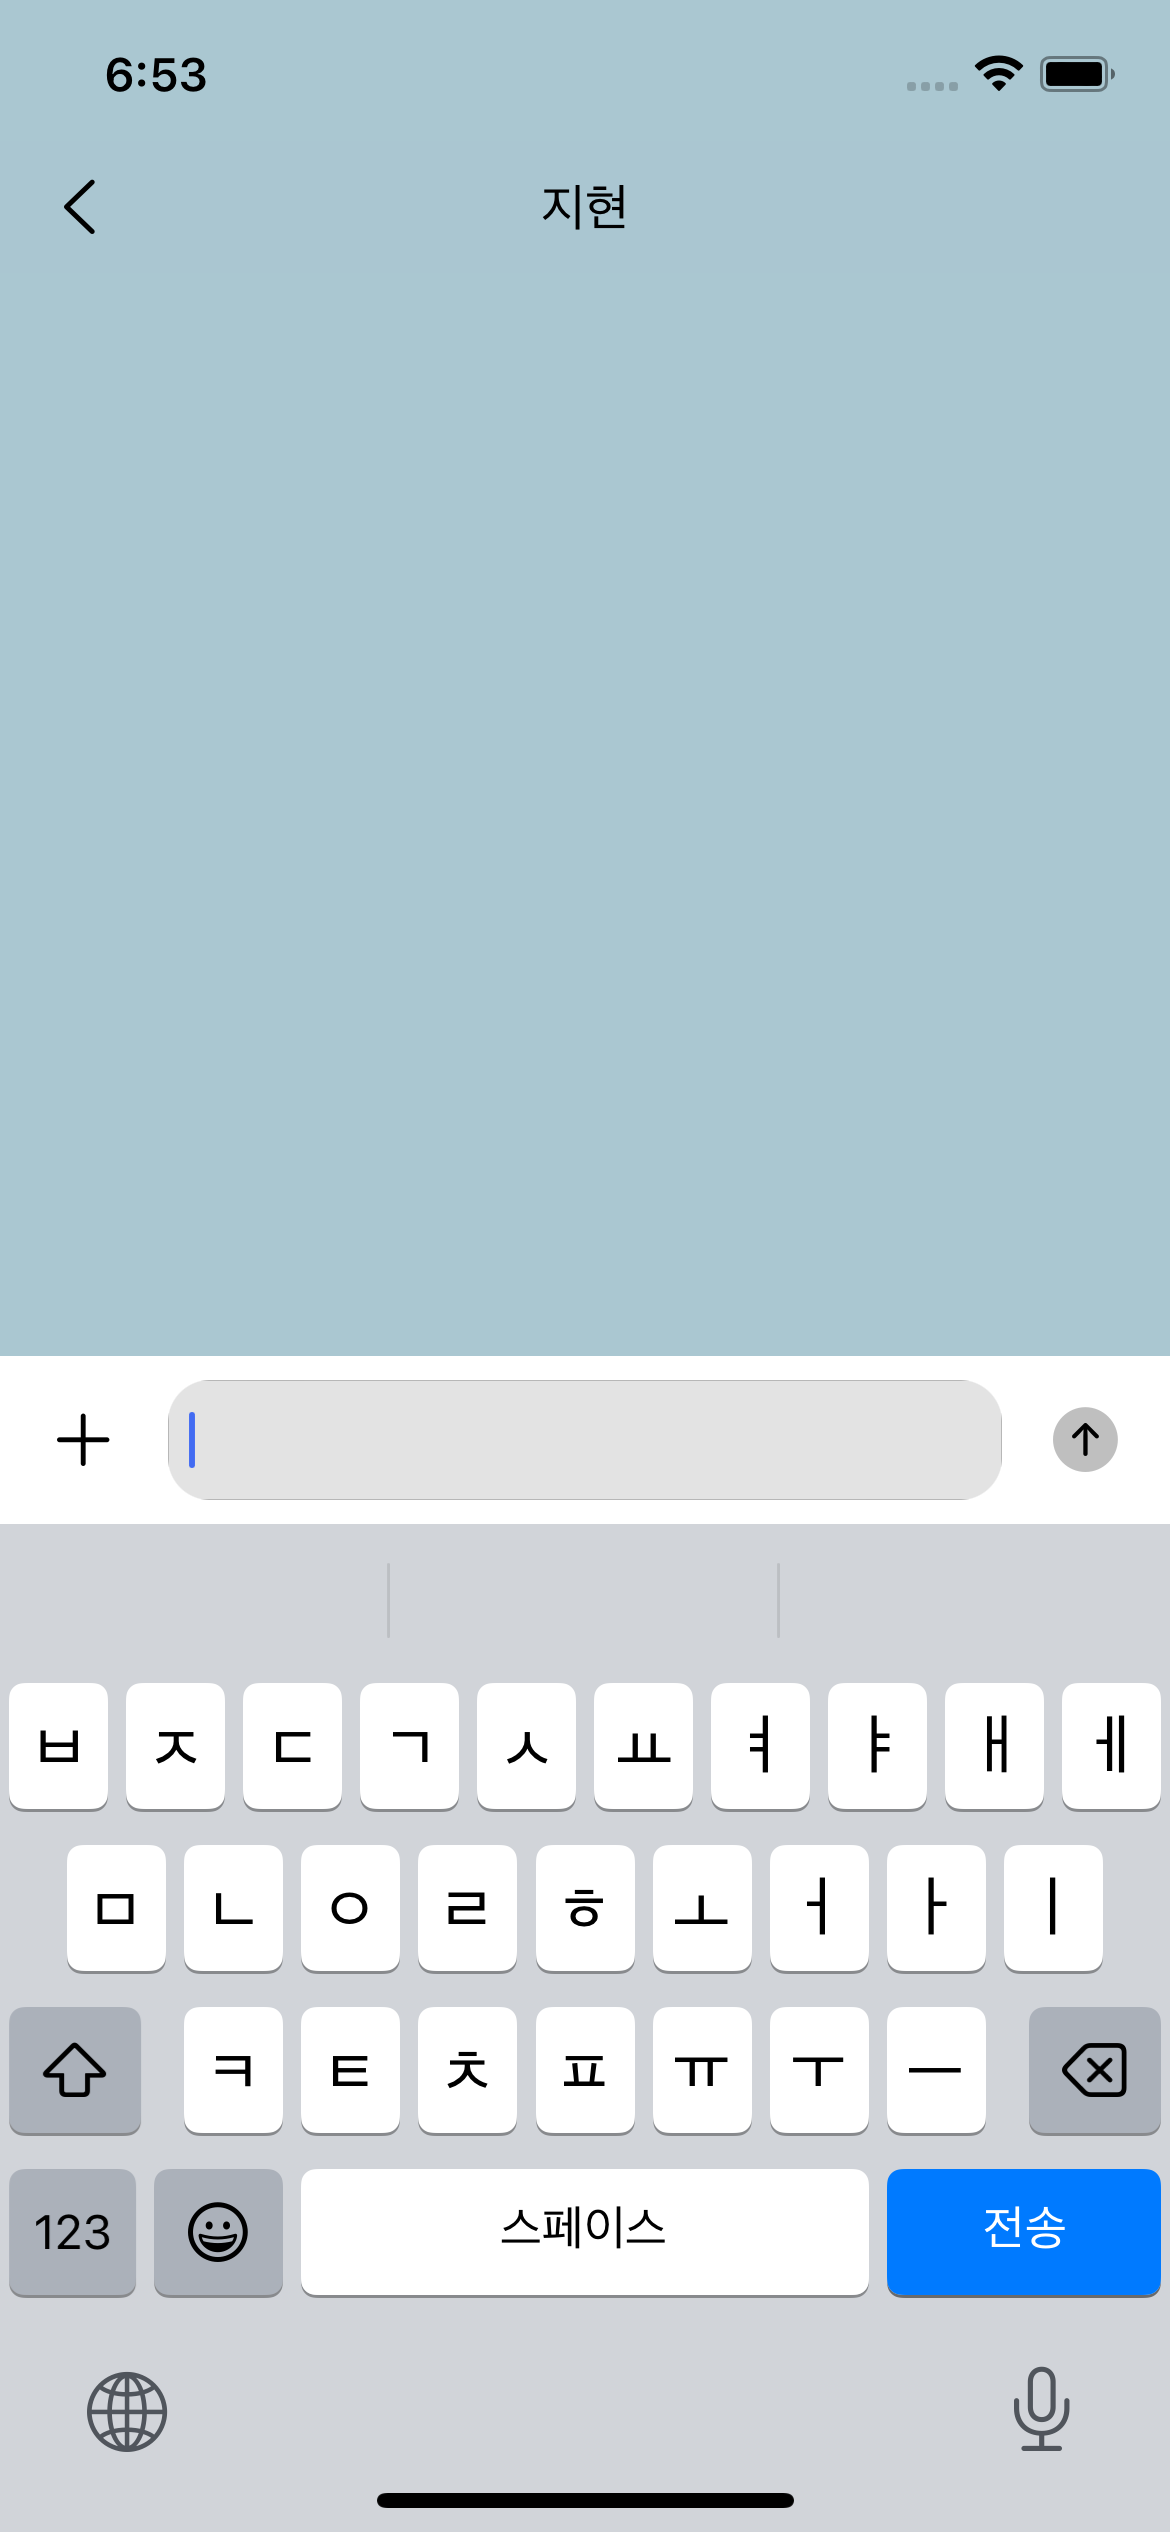
결과
키보드가 올라가고 내려갈 때 텍스트필드도 이격 없이 잘 움직인다.
전체 코드
import UIKit
import SnapKit

class InChatViewController: UIViewController {

    @IBOutlet var messageTextStack: UIStackView!
    @IBOutlet var chatPartnerNameLabel: UILabel!
    @IBOutlet var messageTextField: UITextField!

    var paramChatPartnerName: String?

    override func viewDidLoad() {
        super.viewDidLoad()
        initUI()

        messageTextField.delegate = self
        // Do any additional setup after loading the view.
    }

    override func viewDidAppear(_ animated: Bool) {
        super.viewDidAppear(animated)
        // keyboardWillShowNotification,keyboardWillHideNotification에 대한 옵저버로 self 등록
        // 등록한 옵저버는 keyboardWillAppear(notification:)와 keyboardWillDisappear(notification:)를 호출함
        NotificationCenter.default.addObserver(self, selector: #selector(keyboardWillAppear(notification:)), name: UIResponder.keyboardWillShowNotification, object: nil)
        NotificationCenter.default.addObserver(self, selector: #selector(keyboardWillDisappear(notification:)), name: UIResponder.keyboardWillHideNotification, object: nil)
    }

    override func viewWillDisappear(_ animated: Bool) {
        super.viewWillDisappear(animated)
        // keyboardWillShowNotification, keyboardWillHideNotification에 대한 옵저버에서 self 제거
        NotificationCenter.default.removeObserver(self, name: UIResponder.keyboardWillShowNotification, object: nil)
        NotificationCenter.default.removeObserver(self, name: UIResponder.keyboardWillHideNotification, object: nil)
    }

    func initUI() {
        chatPartnerNameLabel.text = paramChatPartnerName
        messageTextField.layer.cornerRadius = messageTextField.frame.height * 0.35
        messageTextField.clipsToBounds = true
    }

    // keyboardWillShowNotification 알림을 받으면 사용하도록 만든 셀렉터 메소드
    @objc func keyboardWillAppear(notification: NSNotification){
        print("InChatViewController - keyboardWillAppear")

        // 키보드의 최종 프레임 정보를 나타내는 UserInfoKey
        guard let keyboardSize: CGRect = (notification.userInfo?[UIResponder.keyboardFrameEndUserInfoKey] as? NSValue)?.cgRectValue else {
            return
        }

        // 키보드 애니메이션 지속시간
        guard let keyboardAnimationDuration = notification.userInfo?[UIResponder.keyboardAnimationDurationUserInfoKey] as? TimeInterval else {
            return
        }
        // 키보드 애니메이션 커브 저장
        let animationCurveRawValue: Int = notification.userInfo?[UIResponder.keyboardAnimationCurveUserInfoKey] as? Int ?? 0
        let animationCurve: UIView.AnimationCurve = UIView.AnimationCurve(rawValue: animationCurveRawValue) ?? .easeInOut

        // messageTextStack 애니메이션 속성 설정
        UIView.animate(withDuration: keyboardAnimationDuration, delay: 0, options: [UIView.AnimationOptions(rawValue: UInt(animationCurve.rawValue))]) {
            // 제약 조건 업데이트
            self.messageTextStack.snp.updateConstraints { make in
                make.bottom.equalToSuperview().inset(keyboardSize.height)
            }

            // 화면 레이아웃 업데이트
            self.view.layoutIfNeeded()
        }
    }

    // keyboardWillHideNotification 알림을 받으면 사용하도록 만든 셀렉터 메소드
    @objc func keyboardWillDisappear(notification: NSNotification){
        print("\nInChatViewController - keyboardWillDisappear")

        // 키보드 애니메이션 지속시간
        guard let keyboardAnimationDuration = notification.userInfo?[UIResponder.keyboardAnimationDurationUserInfoKey] as? TimeInterval else {
            return
        }
        // 키보드 애니메이션 커브 저장
        let animationCurveRawValue: Int = notification.userInfo?[UIResponder.keyboardAnimationCurveUserInfoKey] as? Int ?? 0
        let animationCurve: UIView.AnimationCurve = UIView.AnimationCurve(rawValue: animationCurveRawValue) ?? .easeInOut

        // messageTextStack 애니메이션 속성 설정
        UIView.animate(withDuration: keyboardAnimationDuration, delay: 0, options: [UIView.AnimationOptions(rawValue: UInt(animationCurve.rawValue))]) {
            // 제약 조건 업데이트
            self.messageTextStack.snp.updateConstraints { make in
                make.bottom.equalToSuperview()
            }

            // 화면 레이아웃 업데이트
            self.view.layoutIfNeeded()
        }
    }

    @IBAction func backButtonCliked(_ sender: Any) {
        self.navigationController?.popViewController(animated: true)
    }

}

extension InChatViewController: UITextFieldDelegate {
    func textFieldShouldReturn(_ textField: UITextField) -> Bool {
        textField.resignFirstResponder()
        return true
    }
}
'Swift' 카테고리의 다른 글
| 앱 기본 언어가 한국어가 아닐때 (0) | 2023.08.16 |
|---|---|
| File not found: libarclite_iphonesimulator.a (0) | 2023.07.19 |
| SnapKit (0) | 2023.07.12 |
| NotificationCenter (0) | 2023.07.07 |
| UITableViewDataSource (0) | 2023.07.06 |


